
|
|
|
|
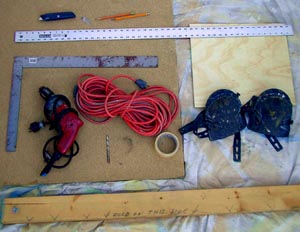
1. Tools for Cardboard Triangles |
Top
of Page |
|
|
|
|
Bending Board Materials and Construction |
||
|
Materials
Construction (1) Place the boards on top of one another and align all the edges. (2) Mark a spot four inches in from each end, and 1 3/4" in from the sides. (3) Holding both boards tightly together drill a hole through both marks using a 9/32" drill bit. (4) Link the boards together using the wing nuts, bolts and washers. The side with the wing nuts is the top of the bending board. |
 |
|
2. Cardboard
|
Top of Page |
|
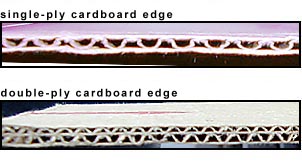
(1). Type and Condition (2).Where to Find the Cardboard |
 |
|
|
Top of Page |
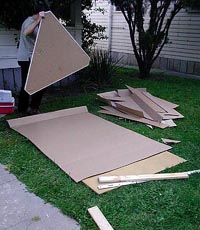
One dome consists of 30 ABB cardboard isosceles triangles with two inch wide tabs on all three
sides and 10 AAA cardboard equilateral triangles. |
|
|
4. Templates |
Top of Page |
|
Take special care when making the templates. Go to the 'Cutting ABB Triangles'
segment of this web page for tips on cutting cardboard. ABB Template Do not bend the tabs of the ABB template. Use the measurements in the two tab diagrams above to measure and mark the bolt holes in the A-side and B-side tabs of the ABB triangles. Drill the holes using a AAA Template The sides of the AAA template should be measured 1/8" short, i.e., each side should measure 47 7/8". This will take care of any extra distance that may be added to the overall length of each AAA triangle due to the width of the pencil lead. When the templates have been cut, edge them with tape. This will prevent them from fraying, make outlining easier and stop you from getting vicious paper cuts. |
|
5. Drawing ABB Triangles |
Top of Page |
|
| (1) Set up the wooden cutting board on a level surface with lots of space around it. |  |
|
|
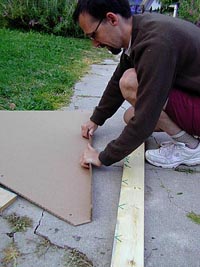
(2) Check the cardboard for imperfections then lay it on the cutting surface. (3) Put the template on top of the cardboard. |
 |
|
|
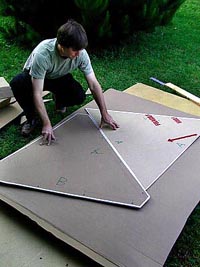
(4) Move the template around to determine the best positioning. To help make the most of
the available space use previously cut ABB or AAA triangles along with the template to help
figure out the most economical way of placing the triangles so as to preserve as much of
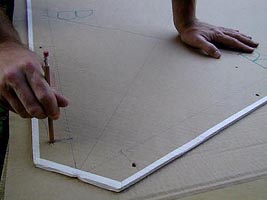
the cardboard as possible. (5) Holding the template in place, draw a thick pencil line around it. - numbers 6 through 9 pertain to ABB triangles only - (6) Make a special point of marking the three points of the triangle. This will help you line up the edges for the creasing of the tabs later on. (7) We have discovered that it is worthwhile to use the existing crease (if applicable) in the cardboard. Lay the template over the crease so that it corresponds to the tab on the template. |
 |
|
| (8) Once the line has been drawn around the outside of the ABB
template, hold the template firmly in place and stick a sharp pencil through the bolt holes,
puncturing the cardboard in all twelve spots (you will enlarge the holes with a drill later
on in the process). (9) When you remove the template, you need to re-draw the triangle point lines, this time marking the inside surface of the new triangle. |
 |
|
6. Cutting ABB Triangles |
Top of Page |
|
|
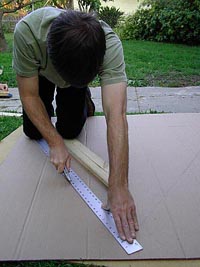
(1) When cutting the cardboard it's a good idea to wear a pair of kneepads. (2) If you need to kneel on the cardboard put a wide piece of wood under your knees to keep from indenting the cardboard. (3) Line up the straight edge with the pencil line, with a very sharp blade try to make the cut so that it only needs to be done once. The best method seems to be sticking the point of the blade through the cardboard, applying pressure and then making the cut. (4) If you have the outlines of two or three templates on one piece of cardboard try to make it so that the first cut slices the cardboard in two, thus making it more manageable. (5) The actual angle of the ABB tab corners is not too important (see diagram above if in doubt), however they must be cut off to allow for easy dome assembly. |
 |
|
7. Bending ABB Tabs |
Top of Page |
|
|
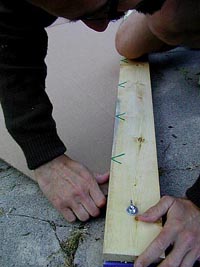
(1) Set up the bending board on a hard, flat, level surface and untighten the nuts. (2) Decide which side of the triangle will be the interior and which the exterior based upon the condition of the cardboard. The interior gets any tears or holes. (3) With the interior side facing upwards, fit the triangle between the two boards of the bender. (4) Line up the corner marks of the triangle along the front edge of the bender. (5) Tighten the nuts. |
 |
|
|
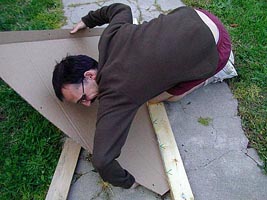
(6) Kneel on the bending board, spreading your legs apart as far as possible (7) Then lean over and essentially give a wide, loose and flat handed hug to the triangle. Be careful when initially putting your hands under the triangle; I've scraped my hands on many occasions. |
 |
|
|
(8) Apply pressure and slowly jog the cardboard upwards until it's perpendicular to
the ground. |
 |
|
|
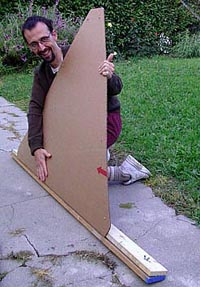
(9) Loosen the wing-nuts, remove the triangle from the bender, then slowly and deliberately
fold the new crease by hand. This will make it more pliable and the dome easier to assemble. (10) Repeat stages 3 through 9 along the other two edges of the triangle. |
 |
|
8. Making Bolt Holes |
Top of Page |
|
| (1) Simply stand the ABB triangle up and drill through each of the marked bolt holes using a 9/32" drill bit. | 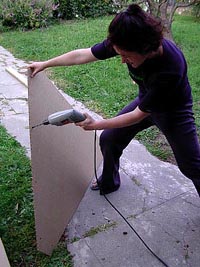 |
|
8. Making AAA Cardboard Triangles |
Top of Page |
|
|
Make 10 (12 if want an extra vent and an extra door) AAA cardboard triangles using the AAA
template. Make sure the sides, once cut, are not longer than 48 inches. |