|
Written/Phtography by Albert V
Many vehicles these days have quite drastic positive offsets to their wheels. ‘Positive offset’ is when the wheels are set inwards under the vehicle and have more rim inside than outside from the centerline of the bolt pattern.
This can be both good and bad. If when lifting your vehicle, you want to widen your track width, it can be as easy as buying a new set of rims. It also means when you install those rims, you’ll need to cover up the tread portion of your tire to keep it street legal in most provinces and states.
One of many manufacturers for Jeep flares, Bushwacker has a huge line up of flares with different widths and configurations to fit almost every vehicle on the road. Of special interest is their line of Cut-Out flares. For those trying to make maximum room for those bigger tires – these will be the flares for you. Bushwacker has found ways to cut and trim the wheel openings on the vehicles for which they offer cut-out flares. I can picture somewhere in a junk yard close to Bushwacker a lot of vehicles with cut quarter panels and a big pile of fenders beside them! I can hear the request to the R&D department: Hey, can you guys cut up a TJ and see if you can make more room for bigger tires, and after that cut up a 2000 Chevy truck?!

With our Toyota in need of an inspection, it was paramount that we had the tires covered. In BC, body or flare must cover the tread area of the tire. Mud flaps must also cover to the centre line of the tire on the rear. This meant a set of aftermarket flares were needed. We opted for the Bushwacker Cut-Out Flares, which also add some needed tire clearance.
Our 4Runner came with 2-inch positive offset wheels. Having switched to an 8-inch wide, 4-inch offset rim, the rims extended two inches further outwards than the stock rims. Add to that the 12-inch wide tires and this combination sticks out 3 inches further than the stock tires. Since we needed to get the Toyota inspected before getting it insured, we needed to cover those tires up, and add some mud flaps too.
When we installed Cut-Out Flares on our Cherokee a few years back, it took some serious trimming to get them to fit. For the Toyota 4Runner, there is less trimming to do. This isn’t because Bushwacker didn’t want to trim more, it’s just that there are fewer options and places to cut in the Toyota body. The flares also offered up a 31/2-inch extended width, which was perfect for our wider-than-stock track width.
For the front fenders, the initial trimming takes place at the back of the wheel well along the bottom of the fender. A line is marked 1-inch in from the bottom of the stock fender and a line needs to be drawn upwards to where the line would meet the stock opening. With this piece cut from the fender, there is a body seam under the fender liner that needs to be hammered flat.
Out back, a line is drawn 1-1/2 inches in from the bottom of the front of the wheel opening and 1 inch in the rear. Again a line is drawn upwards at an angle to where it intersects with the stock opening. As the inner fender is very close to the size of the wheel opening, there is no room for trimming at the top of the fender.
On some models the fuel filler door may need to be trimmed to match the pocket in the flare. The 1987 4Runner does not need this procedure but the trucks may. The flares are fastened to the vehicle with rivets along the outside edge while screws retain the bottom lip to the inside the wheel opening. While we chose to leave the flares black to work with our red-on-black colour scheme, with some slight prep the flares can be painted to match your vehicle. The flares covered our tires perfectly and we sailed through the inspection process with ease – and the truck looks great too!
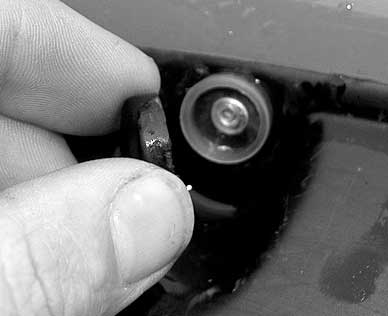
After the fasteners are done, caps cover them up and snap in place over the base, which gets installed like a washer behind the fastener.
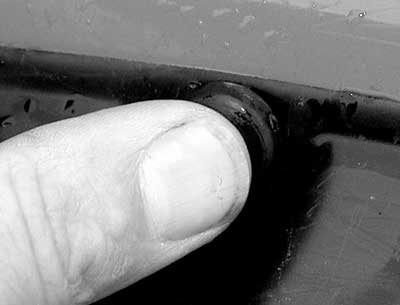
Like the front, trimming the bottom of both sides of the wheel opening opens up the wells for those larger tires. On the back half, a line is drawn 1-inch in from the rear and 1-1/2 from the front. Again draw lines upwards that will intersect with the wheel opening then the openings are cut like the front.
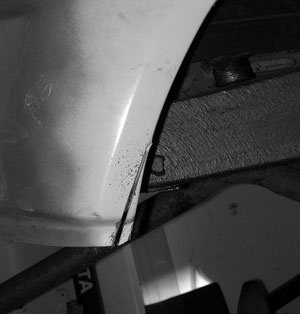
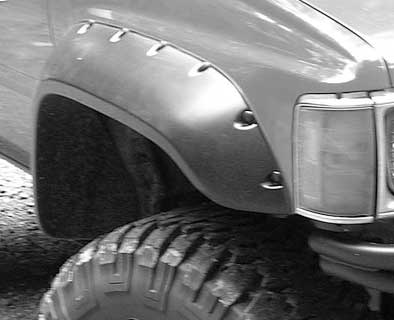
The front detail of the flares matches in nicely with the front signal lights. We tucked our custom made bumper under the signals and the front corners look nice and clean this way. Out back, the flares match the bodylines around the wheel wells. You can see our trim job at the back and our chained back mud flaps, which helped us pass the inspection process. With 33x12.5 tires on 8-inch rims the flares completely cover the tires.
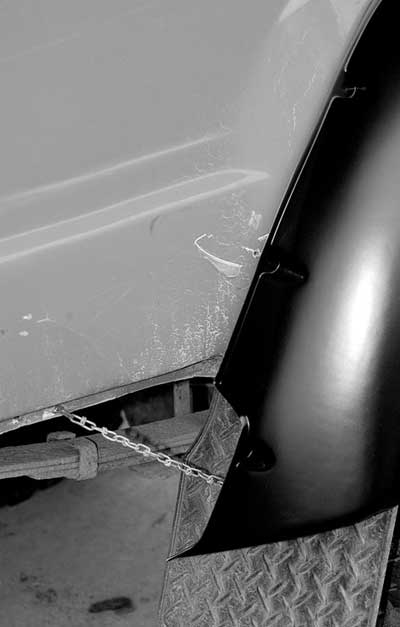
The Cut-Out Flares are designed to work with the stock rear Toyota bumper. Since we removed the rear bumper for better ground clearance, the rear of the Cut-Out Flare needs to be trimmed off to match the bottom of the body.
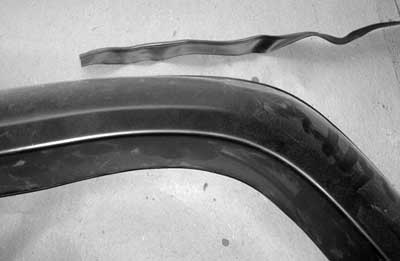
The flares come with a rubber strip that can be installed between the flare and the body. While we chose not to use it for our install it can help seal water and mud from catching between the flare and the body and add a nice trim detail to the install.
4x4 Suppliers
Bushwacker Inc.
6710 N. Catlin Avenue
Portland, Oregon 97203
Toll free: 1 (800) 234-8920
Tel: (503) 283-4335
www.bushwacker.com
|
