|
Written/Phtography by Albert V
After the restoration of the 4Runner’s body and some new lockers and gears for the axles, we were nearing the completion of the first stage of our Toyota build up. But before resorting to a front solid axle swap, we were determined to try out some independent front suspension (IFS) options.
First, remember that almost every vehicle manufactured for the North American market during the past ten years has come equipped with front IFS, which is why we wanted to demonstrate how to improve the wheeling ability of IFS-equipped vehicles
Ford was first to offer independent front suspension in their light duty trucks, Broncos and other SUVs in the early ‘80s with the twin traction beam. Chevy turned to IFS for their entire line of trucks in 1988, while Toyota started in 1986 in trucks and 4runners.
Many Toyota owners hold the 1985 model of Toyota truck (1985) as the ultimate mini-truck, since not only was it the last year of solid axles, it was the first year of fuel injection. The fuel injection was very well received as a huge upgrade for the 22R (now the 22RE), but even though the IFS was a huge improvement in ride quality, it didn’t do much for wheeling ability.
But since Toyota was not on the forefront of rust protection in those days, vehicles from that era are now commonly used as parts donors. In the future, we will cover the advantages of turning an IFS truck into a solid axle truck, but for now, the first step was to lift and build the Toyota as inexpensively as possible so we could go out and have some fun.
We decided on a BDS 4-inch IFS lift system for the 4Runner. BDS includes a lifetime warranty on their suspension systems, which are available at quite an attractive price. The full kit including shocks, all the proper drop brackets for the front IFS and rear lift blocks can be purchased from North Shore Off-road. The kits parts sell for $993.00 for the front kit, $101.00 for the rear block kit and $59.95 for each shock for a total of $1333.80 (suggested NSOR retail).
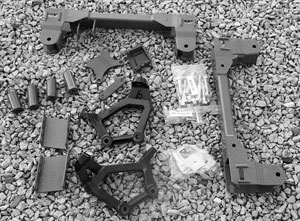
IFS vehicles can be quite complicated to lift in the front. BDS makes the Toyota 4-inch IFS lift as painless as possible with drop spindles, new cross members, bump stop drops and all other required hardware.
Out back it is quite easy to lift as the Toyota has the springs above the axle – a block kit and long U-bolts are all that is needed along with longer shocks. We substituted a U-bolt flip kit from Sky’s Off-road for better ground clearance out back.
While the rear is simple to install (blocks and U-bolts), we turned to Sky Off-Road for one of their U-bolt flip kits. The stock U-bolt plates on the Toyota rear axle hang down quite a bit and the flip kit adds clearance and protects the ends of the U-bolts by pointing them upwards so they don’t get bent and damaged on rocks. The kit, including U-bolts was only $60 US. We also had Sky send us a set of weld-on shock tabs as the stock tabs disappeared with the old U-bolt plates. For this reason and the fact later on in this project we planned on longer rear leafs and a solid axle swap we decided to work in a set a premium Pro Comp remote reservoir shocks and cut the Toyota floor so we could stand them straight up for a better damping rate and longer travel.
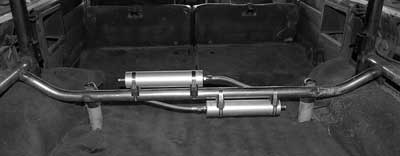
If you plan to add a body lift to your Toyota, you can go with a modified shock hoop in the rear to add longer shocks and keep them under the body – we didn’t care about the cutting so through the floor they went. We added a piece of 1-1/2 tubing between the stock roll bar uprights to act as the upper shock locator. This also ensured the rear seat could still be put up to maintain the four-passenger capacity. The Pro Comp shocks are 6-way adjustable so the ride can be manipulated for weight and on – and off-road conditions.
With the rear suspension complete, we could work on the front IFS, which understandably is a lot more complicated.
The Toyota IFS uses an upper and lower A-arm with a torsion bar for the spring rate. The torsion bar works like a leaf spring or a coil spring but is actually just a long steel bar made of spring steel, splined on each end. Unlike a Chevy where the torsion bar is attached to the lower A-arm (and would also require drop brackets), the Toyota torsion bar is attached to the upper A-arm and doesn’t need any modification at all.
The kit comes with two new drop cross members that relocate the lower A-arm and front differential. This keeps the CV joint shafts from having too much angle which would cause early failure. To attach the now lowered knuckle assembly to the upper A-arm, BDS includes a new cast bracket that bolts to the spindle assembly and into the stock ball joint location to reposition the ball joint to cover the now spread apart A-arms.
The kit also comes with drop brackets for the sway bar, bump stop extenders and brake line drop brackets. Extenders are also included for the differential centre section to re-attach it to the frame points. The instructions are quite easy to follow and only one small cut to one of the old A-arm brackets is needed to drop the front end down. No modifications were needed to the front drive shaft either.
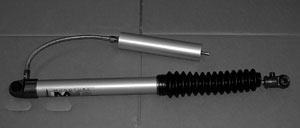
As we eventually plan on longer-than-stock leafs in the rear, we decided to get the shock work over with right away. The rear U-bolt flip kit also eliminates the rear shock mount so that was another reason to prep the rear. We used 12-inch travel Pro Comp MX6 shocks. The shocks offer a 9-way adjustable dampening rate via a dial on the end of the shock.
The stock rear shocks attach to the mounting plate that cups the bottom of the axle tube. We replaced this with a Sky’s flip kit that uses round U-bolts and a plate on top of the leaf pack. We then relocated the shock to the top of the axle tube with a set of shock tabs, also from Sky’s Off-road. Blocks between the axle tube and the leaf pack provided the lift in the rear.
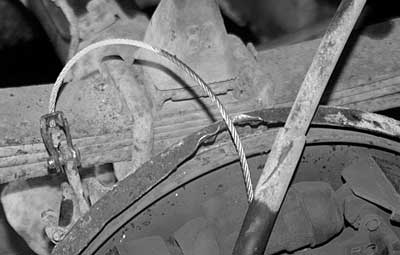
The stock U-bolts are square on top to clamp over the spring pack. The new U-bolts use a new top plate and the U-bolts stick straight up. Sky’s can send you whatever length of U-bolt you need when they package up your flip kit. At only $60.00 for U-bolts and the plates, it is a real bargain.
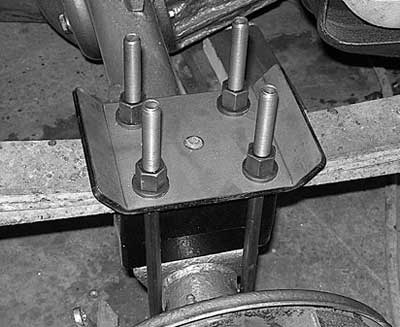
With the flip kit, we ordered a set of weld-on shock tabs that can be positioned and welded to the axle tube anywhere you like – just make sure they are not too close to the springs and that they won’t contact anything when flexing the rear suspension.
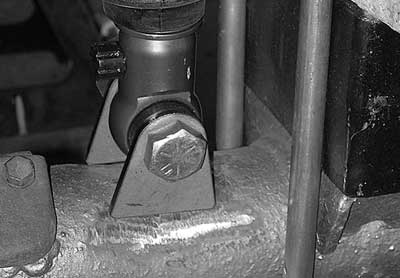
Though the kit includes drop brackets for the stock Toyota brake lines we chose to upgrade those too with longer stainless braided lines from Explorer Pro Comp. We capped off the install with a new stainless steel skid plate to cover all the unsightly drop brackets and steering components.
Dropping the IFS was difficult but nothing that can’t be done with simple hand tools and maybe a ball joint separator. It would be a good idea to pre-soak all the bolts and adjustment cams for anything you plan to remove. We managed to save virtually every fastener for re-use. Remember though, you will definitely need a wheel alignment after installing any lift system.
While the truck looks great and has a pre-runner look to it, any IFS kit you buy that uses the stock torsion bars and stock leaf springs will not be the most flexible truck on the trail. However, we can attest that with the addition of a set of good tires and lockers, we have managed to run some pretty tough trails over the past few months, proving that you can wheel IFS and have a lot of fun.
We have now spent $7700 on the Toyota build (including purchase price of $1500) and we have a very competent vehicle with all the rust removed, lockers, lift and tires, flares, snorkel and a Warn XP 9500 winch. Next up is making it more rock friendly.
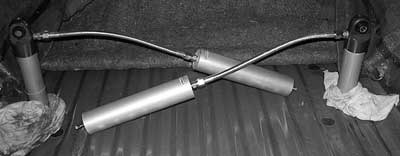
There are kits that use longer shocks to keep them below the body but they angle the shocks inwards. Shocks work best straight up and down. Because we were not worried about cutting up the Toyota, we ran the shocks right through the rear floor. We then built a tube that used the stock roll bar as connection points and welded it in across the rear bed. We drilled two holes in the bar and welded bolts through the tube for the upper shock mounts. The tube also acts as a great mounting point for the remote reservoirs of the shocks.
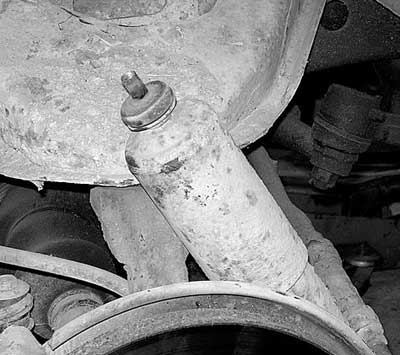
First to come out are the stock front shocks. The BDS suspension can be ordered with shocks to match the new lifted height of the suspension. While we used Pro Comp shocks in the rear we had the kit delivered with BDS shocks for the front.
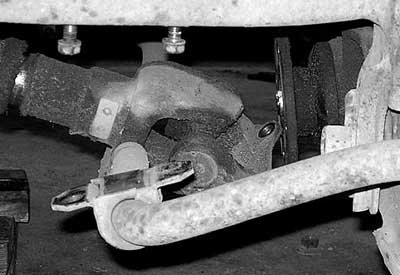
The sway bar can also be disconnected, as there are drop brackets with the kit to relocate the sway bar lower down.
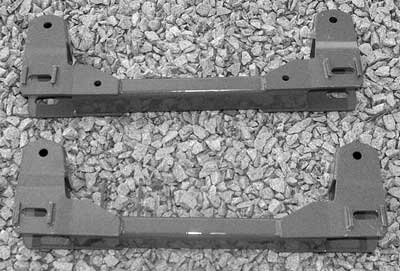
Now for the real work – the front end. As far as IFS goes, this install wasn’t too bad – but in our case it was aided by the fact we removed the front diff to install the locker and gear set. These pictures will reflect the fact we did a complete tear-down of the front end. These two drop brackets relocate the lower A-arm and act as the mounting point for the lowered front differential.
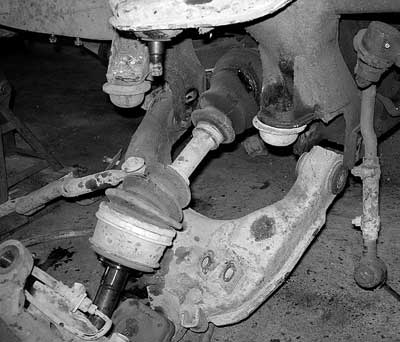
With the brakes and brake lines removed the two lower bolts can be removed from the lower A-arm. The upper ball joint can then be separated from the knuckle.
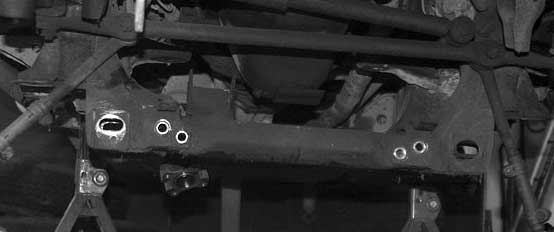
Before the new drop cross members can be installed, the centre section of the front cross member needs to be removed. It is bolted in place on each end.
The new drop cross member bolts into the old cam bolt holes in the stock cross member. Large square washers are used on each side to fill the cam area and keep the bolts in place.
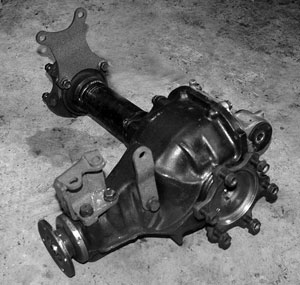
As we mentioned we installed the lift during our gear and locker install. You will not need to remove all the axles, hubs and centre section if you are not doing the axles. But it did give us a chance to clean everything up really nice and install the drop brackets for the front differential on the axle while it was out of the vehicle. It also made it simple to install the lift kit as the new cross member and other parts could be installed one at a time without interference with the axles and differential.
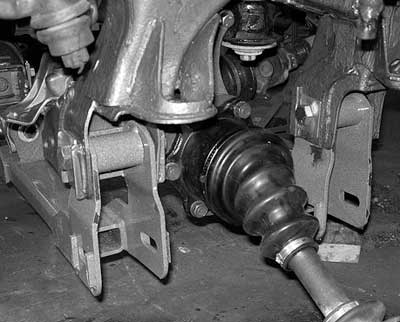
With the new cross members bolted loosely in place, the axle could be lowered onto the new cross member, the bolt that goes through the diff cover installed and the rest of the drop brackets bolted to their rubber mounts.
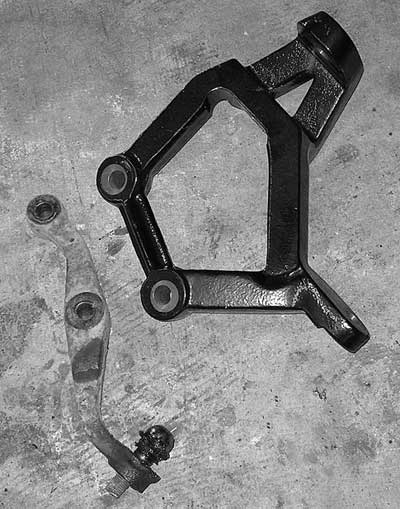
With the drop brackets in place, the two A-arms are now four inches farther apart. The BDS kit includes new cast drop brackets to make up the difference. The stock arms for the steering are removed and the new drop casting is bolted to the knuckle in its place. The top of the new drop bracket bolts to the original ball joint socket with a taper adapter and the ball joint is now attached to the top of the drop bracket.
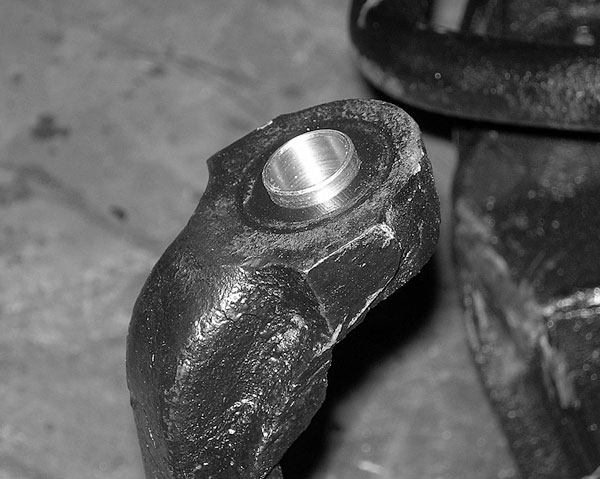
Sleeves are provided to insert into the top of the stock ball joint hole. This changes the hole from a taper to straight so a bolt can be used to attach the upper portion of the new drop knuckle.
Bump stop extensions are used to control up travel. There are two different lengths for the front of the A-arm and the rear. Check to make sure you put them in the right positions. We needed to trim part of the steel edge on the rear bump stops to clear the repositioned sway bar.
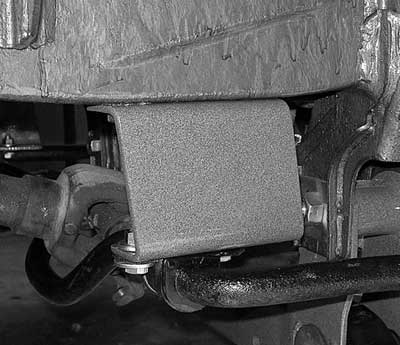
The drop brackets for the sway bar can also be installed now. The brackets use the stock sway bar holes and then the sway bar attaches to the bracket.
While the kit comes with relocation brackets for the brake lines, we chose to use stainless braided line from Explorer Pro Comp. With the A-arms attached and the ball joint tightened down into the new extension knuckle, we installed the BDS extended-length shocks in the front. In the background you can see how close the bump stop was to the sway bar. It required a slight amount of grinding to give it enough clearance so it didn’t catch while extending the suspension. I asked around about sway bar disconnects or running with the sway bar off completely but I didn’t get a firm answer from anyone so we chose to leave it on.
We have put 16,000kms on the Toyota with a lot of trail running including the Rubicon trail. Though the IFS tends to hit a lot of rocks, the Toyota has worked surprisingly well. The tough steel A-arm drop brackets have put up with a lot of rock smashing without any real damage at all. The handling on gravel roads is also exceptional.
4x4 Suppliers
|
