

1-877-479-4823

  |
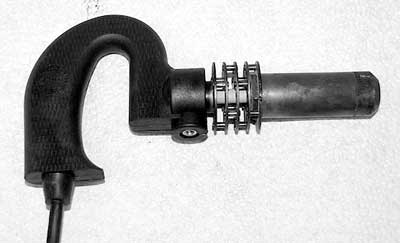
AFCO Racing carries the Ideal Brand tire groover. The groover offers a 250-watt heating element and can be used with an assortment of grooving blades. The groover comes with a #5 head which holds a .290 wide grooving blade for $64.95. The groover comes with a 12 pack of blades as well. 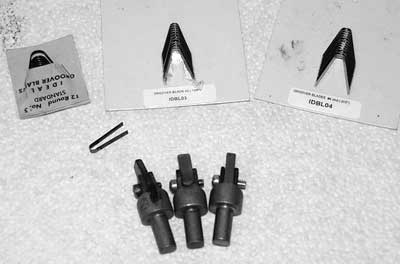
There are six sizes of blades and five groover heads. We ordered two extra grooving heads, a #3 (.125) and a #4 (.215) and the blades to match to make sure we could cut an assortment of sizes. With the difficulty that many of our readers experience in finding a shop to cut sipes into tires, we heard a grooving iron could also be used for this purpose so we ordered up these parts to see for ourselves. 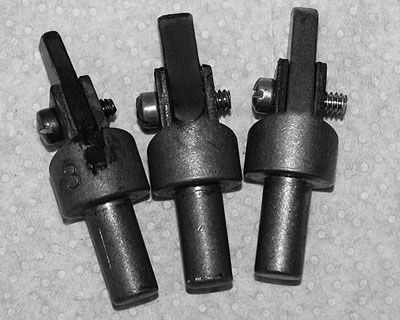
To use different widths of blades you need the corresponding grooving head. The tips are different widths to hold the blade properly while cutting. Each grooving head is only $9.49. The heads insert into the end of the grooving iron. We get questions all the time about where to get tires siped. If you’re wondering, sipes are small cuts made in the lugs of tires to enhance traction. I have found a great benefit to almost any tire that we have cut. As a matter of fact we sipe everything we run on our vehicles. The biggest problem it seems is finding somewhere to get it done as not all tire shops have the machine to do it in-house. That’s why we made a little purchase from AFCO Racing Products this summer to see if we could sipe our own tires. Though it took some time to navigate around the AFCO web site to find the Grooving Iron, it was easy to order a nice 250-watt budget grooving iron for $64.95. A grooving iron is actually made to groove and cut pieces out of tires but it can easily be used to sipe as well. As this was an experiment on our part we order the grooving iron, which came with a grooving head and number 5 blades (.290, just over a quarter-inch). We also ordered two additional heads ($9.29 each) with smaller blades ($7.49 per pack). You will need to buy a head to match each of the different blade sizes you plan to use. The whole order, which consisted of the iron, three grooving heads and packs of blades to match, came out to $150 Canadian with shipping and exchange. I have been paying $15 per tire (plus tax) to get them siped at the local tire shop – half the price of a grooving iron each time I go in! The main reason to try this out was the fact my 46-inch Baja Claws would not fit on the siping machine at the local tire shop – a good motivator to buy the iron. To sipe with a grooving iron you just need to put the blades into the head upside down. This exposes the two tips of the blades rather than the U-shaped cutting centre. It’s a bit tricky to get the blade in the first time but the tool works very well. Once the iron is nice and hot, I siped the entire 46-inch tire in about 15 minutes. We used the #5 blades that came with the iron to sipe the large lugs, leaving the cuts just over a 1/4 inch apart. I used a smaller #2 blade (.090) to add grooves to the small lugs. I plan on using the same siping technique for our PT Cruiser before winter hits to give the tires added traction in ice and snow, like a Blizzack. Of course, to prevent tire damage, we will need to pull the blade back a bit so we don’t cut as deep as we did for the Claws. Using the iron was really easy but having an old junk tire around to practice on before cutting up a $800.00 Baja Claw was a good thing to do to get an idea of how fast the iron moved and how deep to cut. Now with a small investment you too can groove tires without having to haul them off to a tire shop! Groove a few for your buddies and your grooving iron will be paid for in no time!!! Click here to check out the Grooving iron and parts on the AFCO Racing web site at www.afcoracing.com. 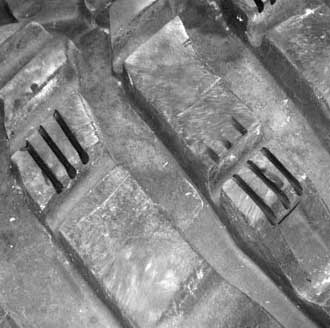
Three slots were cut into each of the small lugs on our 46” Baja Claws. A #3 (.125) head was used for these cuts. 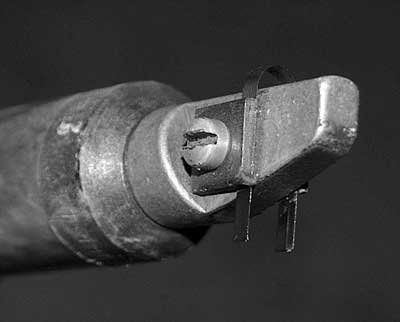
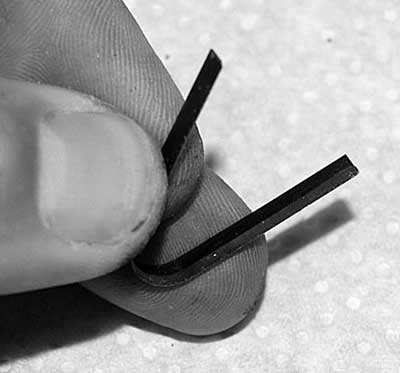
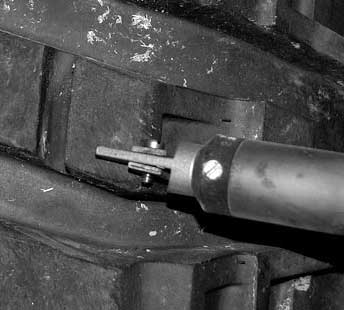
This past winter, someone told us that to sipe tires all you needed to do was install the grooving blades upside down. This was the main reason we bought the grooving iron. To get enough depth out of the #5 blades we had to move the blade to the front of the grooving head. There is still some adjustability to the cutting depth as the blades are quite long. 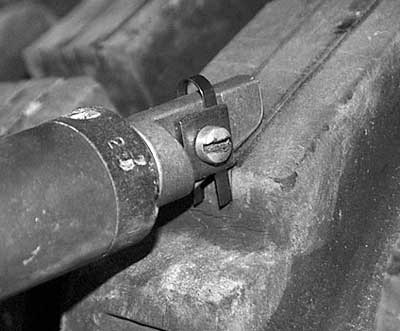
Just like cutting a groove, you just push the blade through the tire. Remember that you are making two cuts at a time. 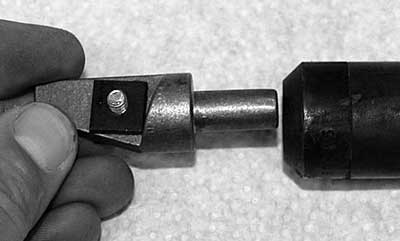
The grooving heads are made of brass so they heat up quickly. The heads slide into the end of the pistol grip iron and are held in place with a set screw. 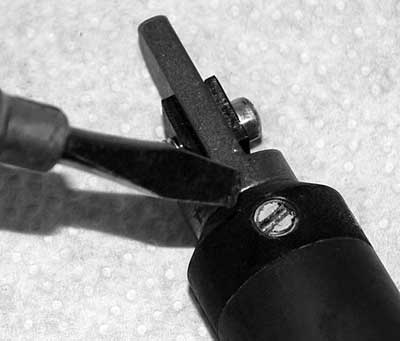
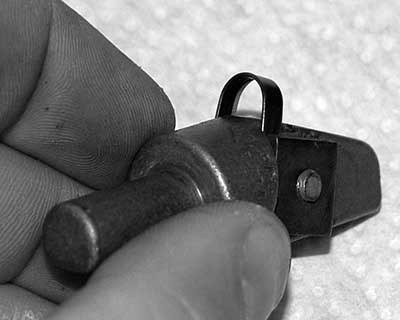
The steel blades are sharp on one side and this edge needs to face forwards to aid in cutting through the rubber. There are two plates – one on each side of the grooving head, which hold the blade in place. 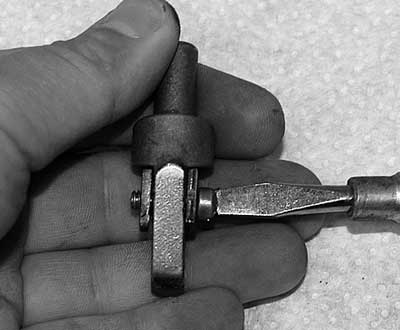
The amount the blade sticks out determines how deep the groove will be when it is pushed through the tire. The deeper the cut the harder it is to push through the tire. Once the depth you want is set, just tighten the screw to hold the blade in the grooving head. 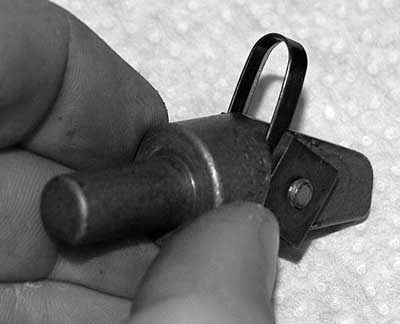
It takes a bit of time for the iron to heat up but once it is hot it goes through the rubber easily. The blades are quite sharp, and extremely hot – make sure to wear gloves and do not lay the iron down on anything combustible while turning the tire or repositioning yourself to make more cuts. Grabbing a junk tire from a tire shop is a great way to practice your cuts before starting one of your good tires. 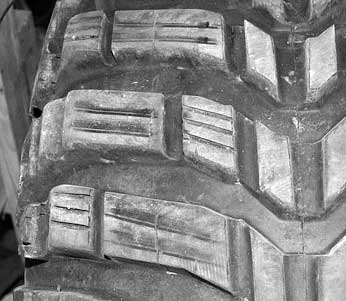
Four sipes were cut into each of the large lugs on the Baja Claws. The sipes were .290 inches apart. If you are cutting smaller width lugs you may want to use a #3 or #4 grooving head to keep the cuts closer together. Unlike siping machines at the tire shop, you can keep the lines much straighter for a cleaner looking job. 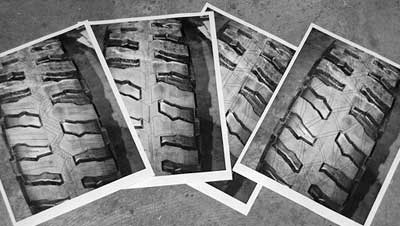
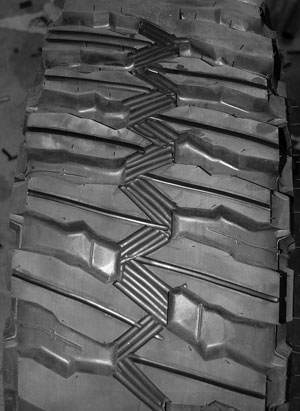
We started by photographing the tire and scanning it into our computer. We then printed off a bunch of pages and drew out a few designs. We planned to try four different patterns on the un-cut Krawler. The Krawlers come in a Red Label (for competition only) and the Blue Label, which is DOT approved. The un-cut Krawler is a Blue Label type – though they are only available in the USA. However, I’m sure you can get a set if you really want them! 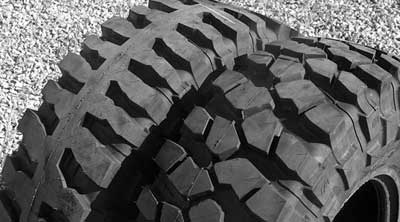
Now for the extreme end of tire grooving. We got our hands on an uncut 37-inch BFGoodrich Krawler last year. When BFG was developing the Krawler KX they made them in the pattern you see at left then custom cut them to test different tread patterns. They also gave out a bunch and took notes on how different people were cutting the tires and the patterns they were creating. In the end the pattern you see on the right hand tire was what you see for sale today. However, we wanted to do a bit of cutting ourselves to see what we could come up with. 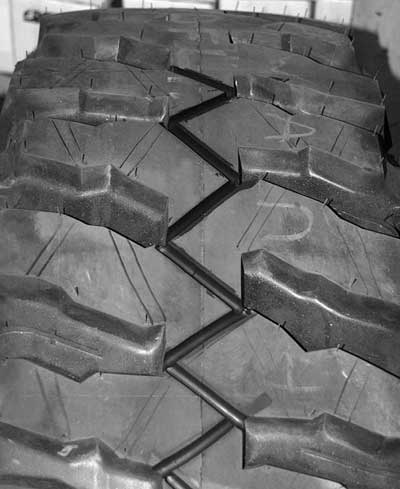
Cutting the Krawlers was easier than cutting the Baja Claws – it just goes to show you how soft the KX’s are. We used a black felt to mark out four different patterns on one tire. We had no plans to use the tire after we cut it up so what ever happened happened – Nice, EH?! 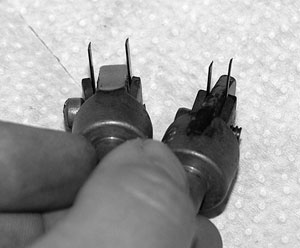
Just like grooving, the width of the sipes can be determined by which grooving head you use. For the big 46 inchers, we used the #5 head. For a tire with smaller lugs you may want to use the #3 or #4. 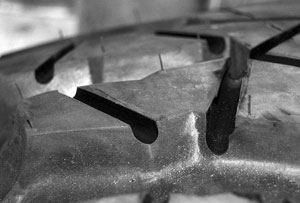
How easy the grooving iron goes through the tire depends on the depth of the cut and how hard the rubber is. It was easier to groove the BFG Krawler KX’s than it was to cut the Baja Claws – even though the Claws are quite soft too. We grooved the Krawlers in two passes to reach the full depth of each groove. 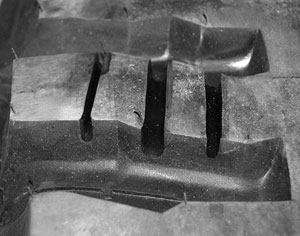
Here are three grooving heads for three different widths of cuts. There are three other sizes available too. 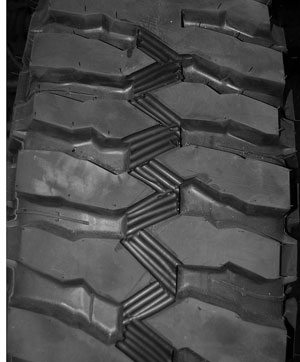
To make wider blocks you just need to cut each groove side by side. Some small bits will be left behind at times but once you get the hang of it, it starts to look pretty good. 
Once the blade cools down you can pull a bit more blade out and go for the second cut if you need it. 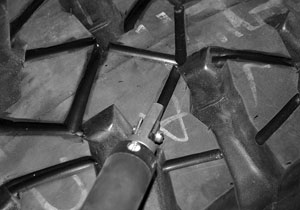
Not sure what we were thinking with this idea. We cut one large groove through each separated lug. We then cut points into the centre and removed most of the centre rubber 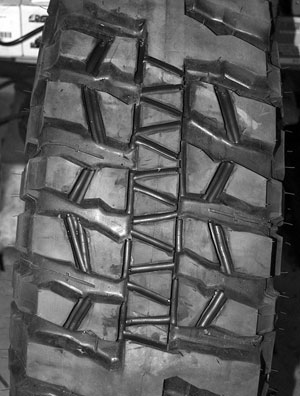
I kind of like this one. We ran two lateral grooves through the centre of the big tread blocks then made a zigzag pattern in the middle. We then made wide cuts through the big side lugs. 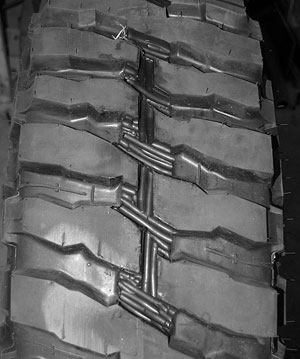
This was our attempt at a Bogger style pattern. The centre lugs are removed, leaving only large outer lugs. This would be a good start at a sand or mud tire. You could cut out more of the width from each lug and scoop them a bit to give you more pull. 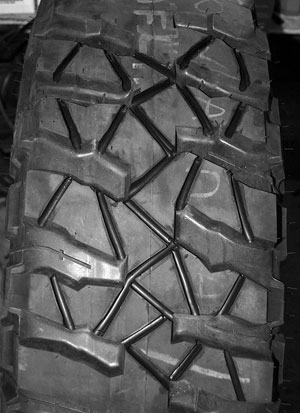
This one looks the most like the pattern BFG came up with for the Krawler KX. I think because the production tread blocks look so similar to this one, it looks the best. It can be a bit hard to believe that all four of these patterns were cut from the same lug design and it was kinda fun. If anyone wants one really weird looking 37-inch KX, give me a call!
4x4 Suppliers
|