

1-877-479-4823
  |
| James Duff is well known for their early Bronco gear, but they also have a good selection of lifts and accessories for down-sized Ford 4x4s. Bronco II’s, Rangers and Explorers can also get Duff Tough! 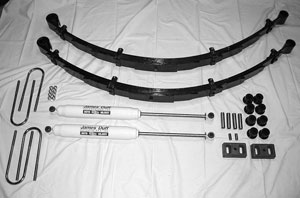 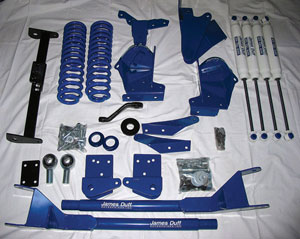 This is the new 5-inch Ranger lift for mid ‘90s Rangers. Duff sells their kits in stages 1-3. This is the stage three kit with full rear leaf springs and the front extended radius arms. The nice thing about the Duff kits is you can start with stage one and add components as you have the cash or need to increase the ability of your Ford 4x4. We have had some questions as of late about lifting some of the newer Ford 4x4’s on the market. It just so happened when we got a call from Steve Fontaine inquiring about just this just as we had heard about a brand new lift that was coming out for the pre-’97 Ford Ranger from James Duff Enterprises. Steve was more than willing to be used for a guinea pig for this first off-the-shelf kit that has long been desired by the Ranger crowd. While it took a little longer than expected the kits are now in full production and provide Ranger owners with a 5-inch lift to comfortably fit 33-inch tires under their trucks. Steve had a hodgepodge of parts under his Ranger to get to the lift he wanted but while the mix of parts gave him room to fit the tires he wanted, it was lacking in flex and off-road prowess. In the front the Duff kit comes with turned-in radius arms, which give the required tire clearance for 33s while retaining the entire turning radius. You can see in the pictures Steve was rubbing the stock control arms with his home-built set up – this will now be a thing of the past for him.
 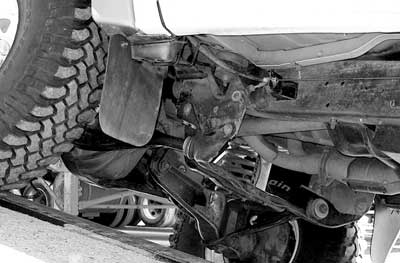
The Ranger front suspension is a mix of radius arms, which hold the axle in place, coil springs, I-beam flexing front axle and a sway bar. The pivot points on the frame for the I-beam suspension acts as a track bar. The length of the radius arms and the flex of the I-beam axle limit flex in these trucks. Tire size is also limited by the radius arms as you need to add lots of off-set to the rims to clear the radius arms when turning with big tires. Duff has created a new extended radius arm that not only allows the axle more travel, but they are angled inward, creating more turning radius without lots of wheel offset. 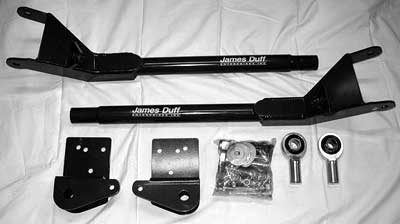 We started out with Steve Fontaine’s 1997 Ford Ranger. Steve had already put some lift into his truck with a hodgepodge of parts, as there wasn’t a lift that would clear the tires he wanted. Tall lift blocks in the rear, used coils from a lifted Explorer, etc. While it rode pretty well, it wasn’t the optimum set up for off-road. The Duff suspension will completely replace all of these parts and add flex and ride comfort to the Ranger. 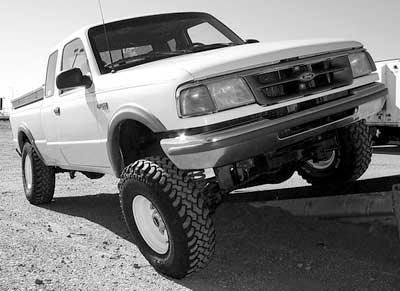
 First up is lifting the vehicle and placing the frame on jack stands. Using a jack, the axle can then be lowered so the coils can be removed. After unbolting and removing the stock shocks, unbolt the retainer clip that holds the bottom of the coil in place. The coil can then be twisted out of the upper coil bucket. 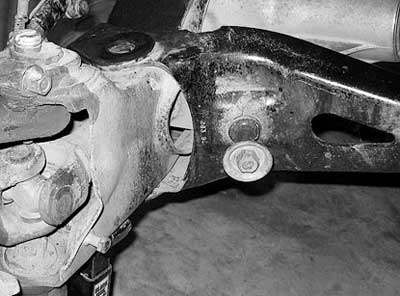 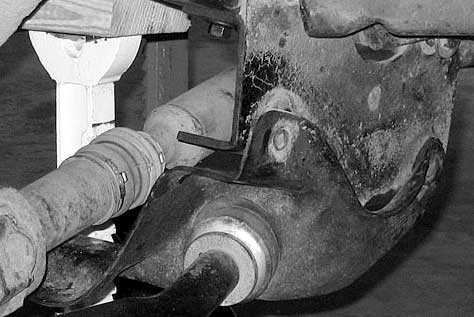 With the axle firmly on jack stands, the radius arms can now be removed. Place a jack under the transmission and remove the stock transmission cross member. Unbolt the radius arm from the axle and grind or chisel the studs holding the frame bracket for the radius arm end. Remove the stock radius arm and bracket. Out back a set of Duff long travel leafs replace the tall blocks Steve used to lift the rear. In the rear a set of 70/30 shocks help control axle movement and match the dual front shocks. A new cross brace is included up front to help stiffen the new longer, relocated control arm brackets. To help cover the distance between the frame and the axle of the higher truck the kit is finished off with a set of extended stainless brake lines. The truck has achieved the proper lift height for the larger tires and eliminates the forward rake found on the stock trucks. As for flex? The new setup provides far better wheel travel right out of the box and the coils and leafs are not even broken in yet! Ride control is excellent and the gear looks great in the Ford Blue powered coat too. If you have a Ranger, Bronco II, or Explorer – James Duff has a suspension to fit your budget and desired tire size. All their kits can be ordered in stages so you can add components as you need too and still keep on budget and get the most of your downsized Ford 4x4! 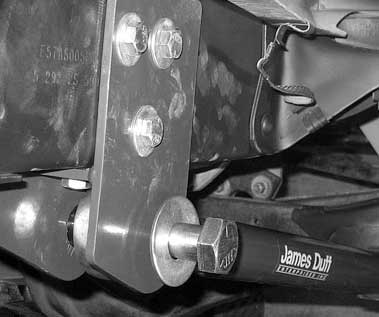
Using the existing transmission mount holes, bolt the new radius arm bracket in place. The bracket should be 5 inches back from the firewall body mount bracket. It may be necessary to enlarge the holes to 1/2 inch so the bolts will slide through. In some cases the third hole needed to bolt the bracket in place may be missing – use the bracket as a template and drill an extra 1/2 inch hole. 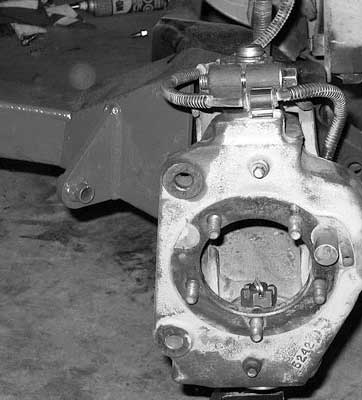
Thread a jam nut onto a rod end then thread the rod end all the way into the new radius arm, and back it off three turns. This will be your preliminary radius arm length. The rod end goes into the bracket with a 1-inch spacer on each side. Slide the one-inch bolt through the bracket, spacers and rod end and leave loose until both sides are ready and the new transmission cross member is installed. Attach the radius arm to the axle and torque the radius arm to axle bolts to 190-220 ft-lbs. 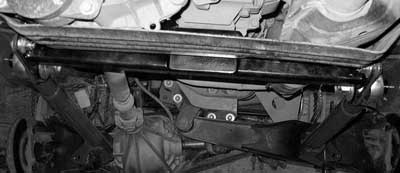
With both radius arms and brackets in place, the new transmission cross member can be slid up between the mounting brackets and aligned with the transmission mount. Slide the 1-inch bolt that goes through the rod end through the new cross member. Use the supplied grade-8 bolts to secure the rest of the cross member to the radius arm brackets. Torque all the bolts to the supplied specs including the bolts through the rod ends. 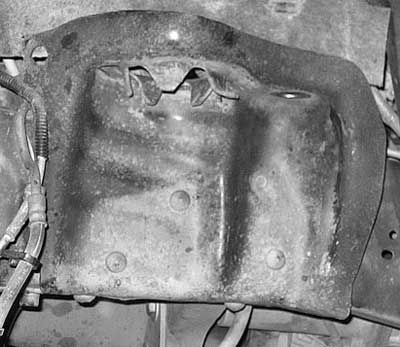 Next is the removal of the stock shock/coil bucket. We will be replacing these with the Duff dual front shock bucket. Use a grinder to remove the heads from the studs holding the bracket to the frame and remove the coil bucket. It will be necessary to unbolt the I-beam bracket on the passenger side in order to remove the coil bucket. 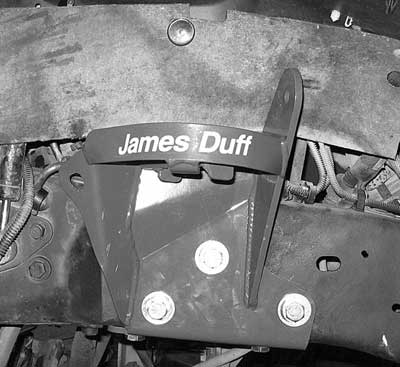 The new coil bucket uses the stock holes from the old coil bucket to bolt in place. Using the new coil bucket as a guide, drill out the old rivet holes to 1/2 inch and loosely place a bolt in each hole as you drill it. This will help you align the other holes as you drill them out. Torque all the bolts to 90 ft-lbs.  Two new holes will need to be drilled for the dual shock bracket. Install a 6 1/2 inch bolt through the hole in the coil bucket through the hole in the rear shock bracket. Measure 5 inches back from the bracket on the coil bucket and flush it with the bottom of the frame – clamp the bracket in place and drill the holes through the frame and attach with the supplied hardware. 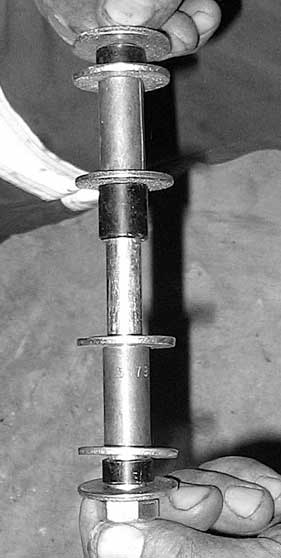
The long bolt in the upper bracket slides though the top of the dual shocks with sleeves and spacers like shown above. All the truck needs up front now are extended brake lines and a wheel alignment! 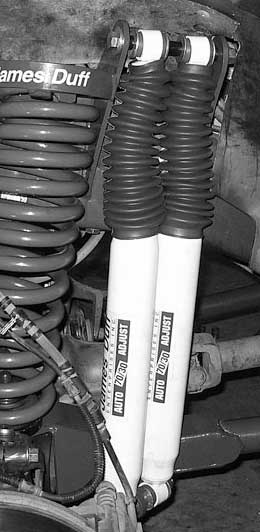 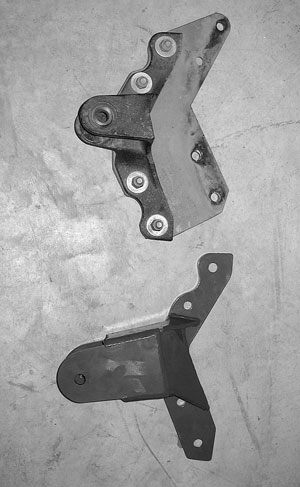
Not done with the grinding yet! The old I-beam drop bracket will need to be removed from the engine cross member. The drop brackets are needed to keep the front axle aligned – remember the axle acts as the track bar keeping the truck going straight down the road. 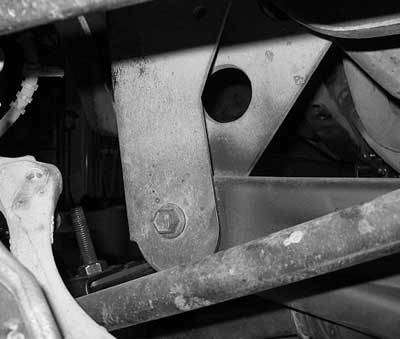
keep the front axle aligned – remember the axle acts as the track bar keeping the truck going straight down the road. Pretty self-explanatory. Old bracket above – new bracket below. 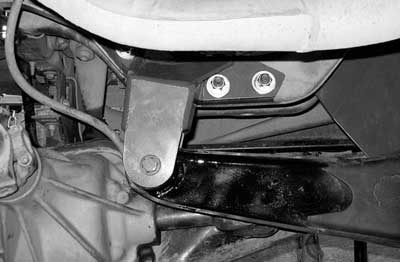 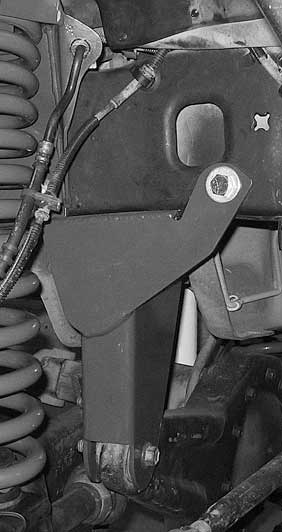
On the passenger side the I-beam will need to be removed from the old bracket (like the cross member bracket) but the old bracket is bolted in place rather than riveted. Bolt the new bracket in place and bolt the I-beam into the new bracket. 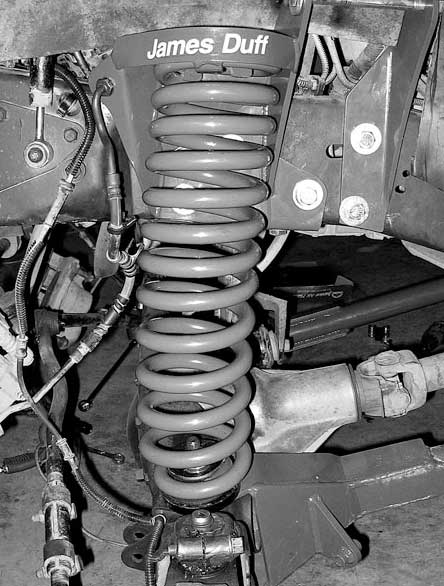
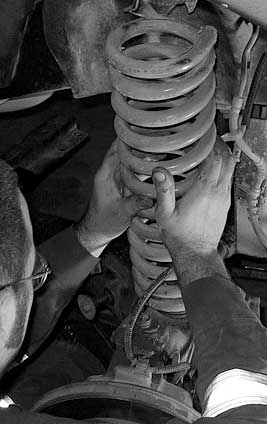
The stock bump stop can now be reinstalled and the new dual rate coil can be installed. 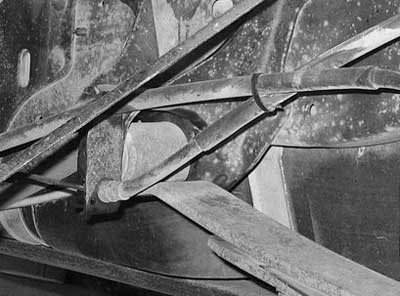
It is a good idea to spray everything with WD 40 before you start to undo stuff. Start a week or so beforehand and spray everything down – you will be glad that you did! 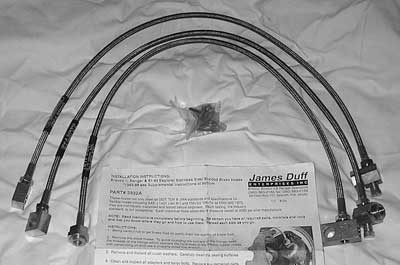
The kit came with extended stainless braided DOT brake lines. There is a bracket on the upper coil bucket to attach the supplied fitting and the lines directly replace the stock lines. 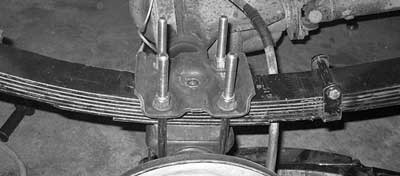
The rear is quite easy. Support the frame with jack stands – cut or unbolt the old U-bolts with a jack under the axle, lower the rear axle with a jack, unbolt and remove the old leaf spring and replace wit the new leaf spring. Raise the axle back up with the small blocks provided with the kit and torque the new U-bolts in place. Don’t forget to cut off the excess ends of the U-bolts. 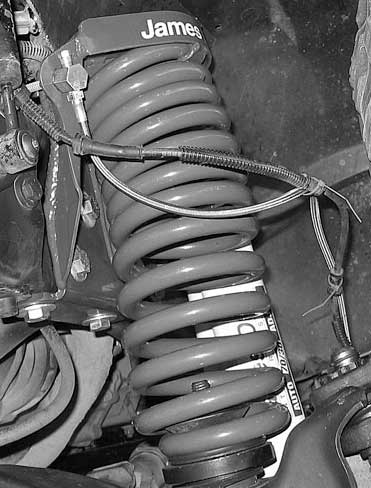 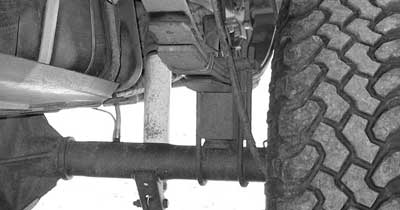 Out back Steve used a tall block to clear his 33-inch tires. We are going to replace these with long travel leaf springs and new shocks.  All there is left after all the bolts are tight is to install a set of 70/30 James Duff shocks out back! 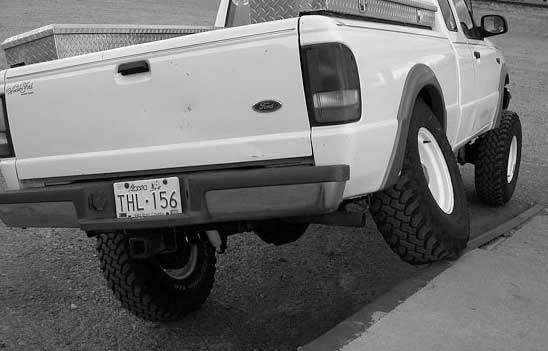
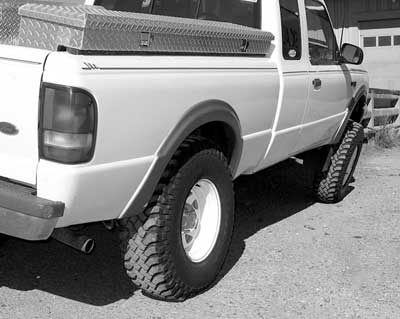
Check out the rear tire stuff compared to the before pictures. Now Steve is getting the most from his Ranger! It didn’t take him long to go out and get it dirty. I think it was the weekend after it was finished! If you have a Bronco II, Ranger or Explorer there is a Duff kit for you that can make your rig into an off-road performer. Give Duff a call for a full line catalogue. 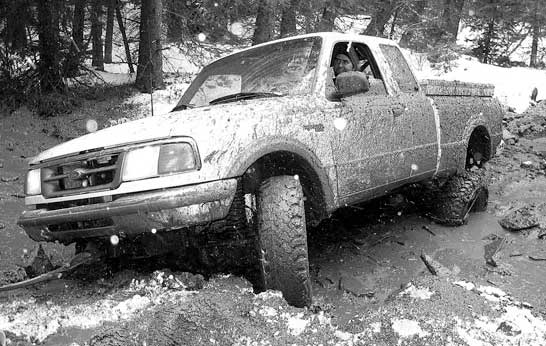
4x4 Suppliers
|