  |
||||||||||||||||||||||||||||||||||||||||||||||||||||||||||||||||||||||||||||||||||||
 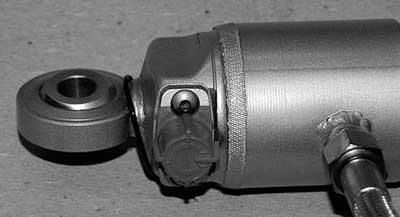
Fresh off the drawing board – Rancho’s new 9-way adjustable coil-over! This new suspension component combines the popularity of the coil-over-shock assembly with Rancho’s proven adjustable shock valving. Two shock lengths are available – 32.3 and 36.3. Ten different part numbers cover all the most popular coil rate combinations, and soon others will be available. 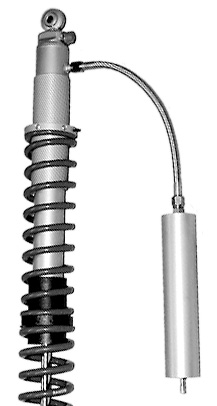

Coil over shock assemblies have become very popular for rock crawl rigs over the past few years – we have a version in our Jeep. A coil over combines the shock and coil springs in one assembly – perfect for tight spaces. The other advantage of a coil over is the fact you can combine different lengths of coils and spring rates to best match your vehicle. As soon as we heard that Rancho was stepping into the coil-over market with a 9 way adjustable coil-over based on their popular RS9000 shocks we knew a set had to land in our Jeep to replace our non-adjustable versions. Patients was a virtue as it is with any new product and the coil-overs just started shipping this January. While we had a great set of Fox shocks in our Jeep, in order to adjust dampening in different conditions we needed to add and subtract nitrogen from the shocks – a real pain. Plus the fact that the only shop that could do it was a motorbike shop and most were very hesitant to help me because they were not familiar with the aplication. I always liked the Rancho RS shocks and once we add an in-cab adjuster we will be able to adjust dampening on the fly for different road and trail conditions. These coil-overs come in two lengths – 32-inch long and 36-inch long. The 32-inch shock comes with two 12-inch coils while the 36-inch shock comes with a 12 and a 14-inch long coil. A slider gets installed between the two coils to keep them together and off the shock body. A threaded sleeve with 12 inches of adjustment slides over the shock body and a threaded adjuster helps you set ride height while a coil cup installs over the bottom to retain the bottom coil.
2 shock lengths and 10 part numbers cover a range of coil rates. Which shocks are right for you? You will need to figure out which length you need first. After this the weight on each corner of your rig will need to be weighed. Subtract the weight of the axles, tires, rims and half your control arms. This gives you your sprung weight. Check out Ranchos Spring Selection Guide (PDF). Now you split the rear in half and the front in half this will give you the weight of each corner the shock has to hold up. Coil rates are rated by how much weight it will take to push the coil down one inch. Keep in mind the weight will affect both coils the same so the rating of the two coils is combined then divided in half. So for us it was 350+250 /2 = 300lbs to push our two coils down one inch. Other thing effect coil rate such as any angle on the shock, fuel when added and all your gear so make sure you factor these things in when you buy your shocks. So far we are extremely happy with the shocks and the ride is actually softer than before when the shocks are set at 1 and very stiff and aggressive when adjusted up – just what we were looking for! 
Rancho brings their shock technology back to the rock crawler. Rancho’s RS9000 shock series has long been hailed as the best off-road shock for its price and adjustability. With the interest in coil-over assemblies over the past few years, the wheeler hasn’t had the adjustable option anymore (unless you boost the nitrogen in the shocks, which is a pain at best). Rancho is back in the forefront again with this new remote reservoir, 9-way adjustable coil-over assembly. 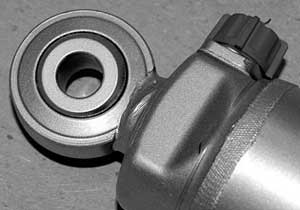
Heims ends are used on the top and bottom of the shock. This allows some shock movement to control binding as your suspension articulates. 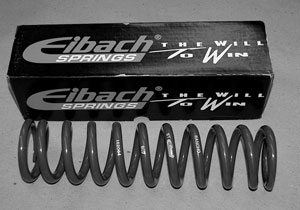
Rancho has brought the coil technology from Eibach into the system. Eibach has long been known for their excellent performance coil springs and the ones used for these coil-overs are no exception. Using a dual coil system means more adjustability in the coil-over assembly. Depending on your shock length the coil-overs come with two 12-inch coils (32-inch shock) or a 12- or a 14-inch coil (36-inch shock). 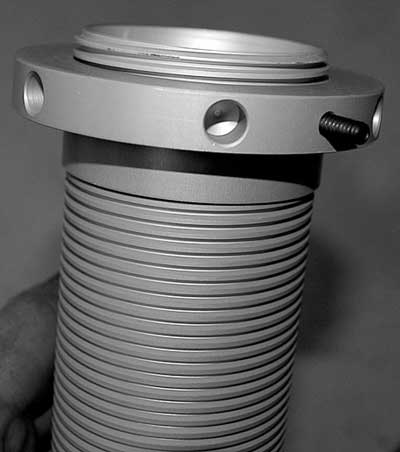 Each assembly has a sleeve that is threaded for coil adjustment. A collar screws onto the sleeve and has an Allen head set screw to hold it in position. The collars have holes drilled in them to facilitate the use a steel bar to turn them for adjustment. 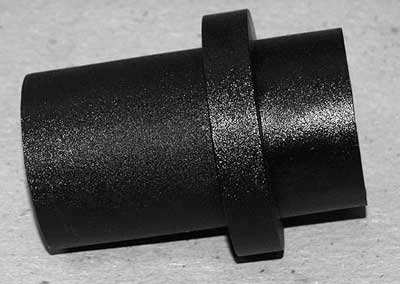 A slider is needed between each coil spring. If for some reason you need a tender spring – you will need another slider. The slider is made out of hard plastic and holds the two springs together in-line, and protects the shock body. 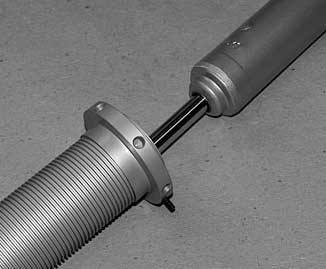 The threaded sleeve and adjustment collar get installed onto the coil first. There is a top and bottom to the sleeve, there is a notch inside one end that slides up onto the wider section on the shock, below the remote reservoir hose. With the threaded sleeve in place the 12-inch coil can be installed. 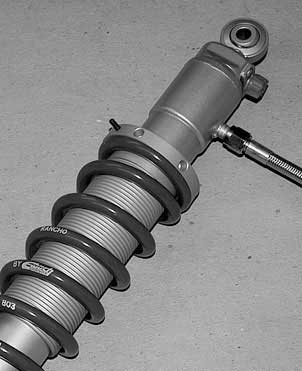 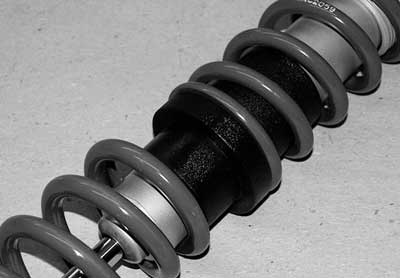
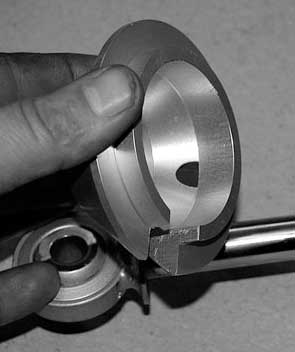 The bottom coil retainer slides over the shock shaft and rests on the bottom of the shock. When you preload the coils by screwing down the adjuster, the pressure will keep the assembly together. If you do not preload the coils the springs may pop out under full extension. If you feel you will not be able to screw the adjuster down enough to get proper ride height for your vehicle, a keeper spring can be added to the top. The job of the keeper is to not affect over-all spring rate, but to extend under full compression to keep a load on the springs so they stay together. 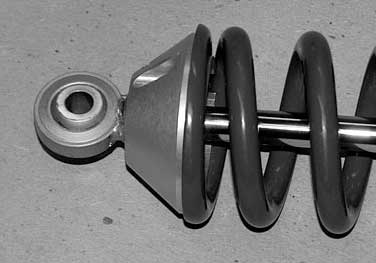
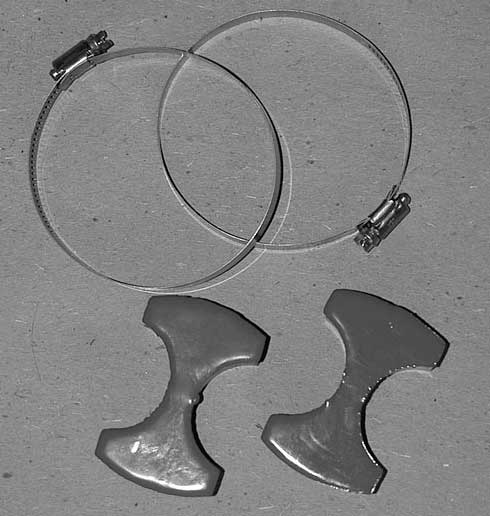
The shocks come with a mount for the shock reservoirs. Make sure you check your turning radius and keep the hoses and reservoirs clear of the tires and any heat that could affect the gas pressure. 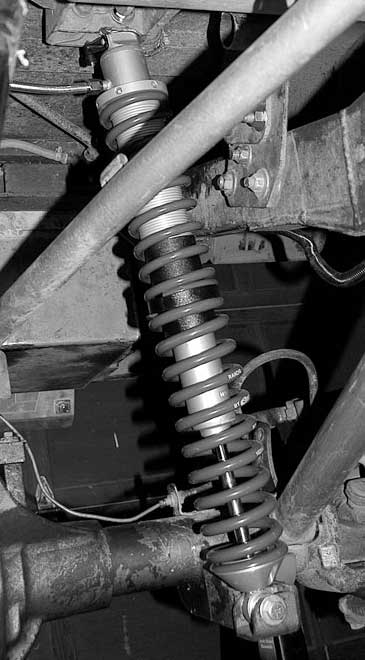
Here is the whole assembly together. Notice how far down the sleeve the adjuster is. We needed to screw the adjuster down this far to add a 1/2-inch of preload to the coils so when under full stretch the coils do not come off the assembly. This is typical for this type of application – but it does show there may be room to experiment with coil length and coil rates beyond that offered by Rancho. Due to the weight of our Jeep, we used a combination of 250/350 coils. 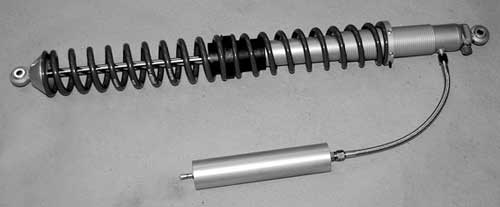
4x4 Suppliers
|
||||||||||||||||||||||||||||||||||||||||||||||||||||||||||||||||||||||||||||||||||||


