|
Written/Photography by Albert V
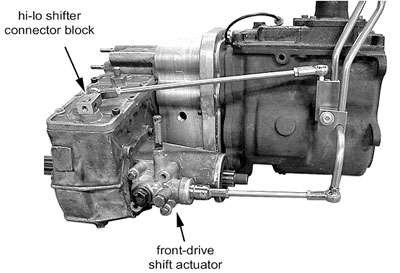
 Here’s the complete kit as installed on a tranny/t-case/ with adapter. Having enough room to install and remove this connecting block for the hi/lo shifter is extremely helpful – that’s where the body lift comes in handy. I installed and removed this component a number of times to adjust the rod length to the point where the shifter sticks were correctly aligned with each other and didn’t contact the edges of the hole in the tranny cover. Near the front output shaft, the front drive shift assembly needs to be separated from the transfer case by removing the four bolts that secure it. Once loosened, there are two indents in the transfer case housing that allow the shift fork to be slid though the opening Take care not to damage the gasket – if it’s in good shape it can be re-used. If you’ve ever thought that your Land Cruiser transfer case shifter linkage was kind of hokey, well, you’re right. The wimpy little swivels, the number of bends in the linkage, and the fact that they get old and worn out all add up to a very sloppy control of this very important function.
Fortunately, Advance Adapters has designed a perfect cure for the sloppy shifter blues: a Twin Stick for the Land Cruiser t-case. This kit includes everything you need to replace the single transfer case shifter mechanism with two solid shifters that provide a much more positive actuation for Hi and Lo ranges, and 2-wheel to 4-wheel drive.
As a bonus, these shifters provide a previously unavailable option by allowing you to shift into 2-wheel drive in low range.
Advance Adapters offers seven different variations of the shifter to account for the most common Land Cruiser engine/tranny/t-case combinations in use out there, including stock engines and transmissions, Chevy V8s, SM460s, TH350/400s, Rock Boxes, and various adapter plates.
In my case, I have a Chevy V8 mated to a stock Toyota 4-speed tranny/t-case, which calls for part number 715571. When I eye-balled all the parts that were included in the kit, I could tell that this was definitely going to be an improvement over the stock shifter. The 5/16-and 3/8-inch threaded rod linkages connect with heim-joints, and the rod lengths can easily be trimmed to suit your particular configuration. In the installation instruction, Advance notes that some welding is required, and suggests that an inch of body lift is necessary to provide adequate clearance for the linkages.
I spent a bit of time test-fitting and measuring the linkages before committing to any welds or cuts. The actual lengths and positions of the various components will vary for each different Cruiser.
Once the assembly is removed, the smaller nut that retains the locking spring and ball for the shift detent can be removed, followed by the larger nut that provides access to the fork retainer shaft.
Once the retainer shaft is removed, the entire shift shaft can be slid out of the assembly, and replaced by the one included with the twin shifter kit.
Re-install the fork onto the new shaft, secure it with the retainer, and replace the locking ball and spring. When re-attaching the assembly to the transfer case, be sure the shift fork is correctly positioned on the output shaft, and test that the shaft moves in and out properly before tightening the four bolts.
I started by draining the fluid from the transfer case. Next, an access panel on the transmission tunnel cover was removed. Since this Cruiser was treated earlier to an aluminum body, I just had to remove a few self-tapping screws that fasten the panel to the tub, and I had easy access to the t-case shifter. The old linkage needs to be detached in three places: One on the side of the transmission, at the hi/lo selector at the top of the transfer case and at the rear-facing pivot for the front drive actuator. The shifter gate also needs to be detached – this item will no longer be used.
Near the front output shaft, the front drive shift assembly needs to be separated from the transfer case by removing the four bolts that secure it. Once loosened, there are two indents in the transfer case housing that allow the shift fork to be slid though the opening Take care not to damage the gasket – if it’s in good shape it can be re-used.
Once the assembly is removed, the old shift shaft can be replaced with the new one supplied with the Advance kit by simply swapping over the shifter fork to the new shaft. Some care needs to be taken when re-attaching the assembly to the transfer case to be sure the shift fork is correctly positioned on the output shaft inside the t-case.
The kit contains a new pivot shaft for the twin shifters that replaces the complex dual-purpose stock shifter. Bushings are supplied that allow the new shifters to rotate easily around the pivot shaft. When the test fitting is complete, the shifters need to be welded to the metal blocks, as does the L-shaped rod that loops over the front drive shaft.
After that, the length of the connecting rods can be finalized, and the entire new shifter assembly can be painted and installed.
Once installed, the shifters felt extremely solid with none of the rattle and shake of the old one. Having the additional choice of low range two-wheel drive can be handy at times. Just remember to take it easy on the throttle when using this feature – you’ve effectively doubled the torque to your rear axle, and if you’ve got some horsepower under the hood, this could easily lead to failure of some other drive line component if it’s not built for it.

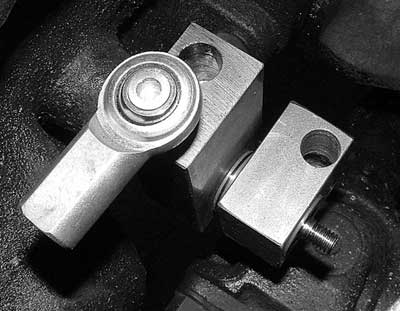
Install the new pivot shaft for the twin shifters onto the side of the transmission. Bushings are supplied for the metal blocks that fit on this pivot shaft. The inboard block will receive the shifter stick for hi/lo selection, and the outboard block will receive the shifter stick that engages the front-wheel drive. When the test fitting is complete, the shifters need to be welded to the metal blocks.

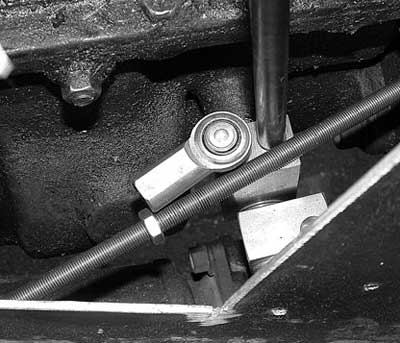
To gauge how long the ready rod for the hi/lo actuator needed to be, I installed the metal block on the t-case shift actuator and tightened the set screw to hold it in place. Then I positioned the shift stick at its most forward position (4-Hi), and marked the desired length of the rod. Fine adjustments to the length can be made by turning the heim joint in or out.
Adjusting the length of the rod for the front drive actuator is a little easier – it’s very easy to slide the pin out and turn the joint in or out. Finish up by treating the new shift shaft with a new protective dust boot.

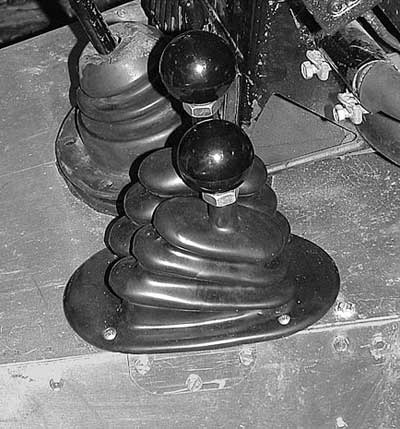
The shifters come with a dual stick boot to finish off the install. While the knobs are not marked front and rear, The Hi-lo is the left one, 2 wheel drive/4 wheel drive is the right one.
4x4 Suppliers
|
