|
12. Now it's time to cut the ribbons apart. Take out the ruler, etc again. Place the ruler at the measured and noted points and make a cut there. Repeat this for every ribbon and one by one they are almost done. For future use the ribbons you don't need right now can be left on the glass, good storage-place. |
| ||
| Make a few spares, they may come in handy. | Now all the cuts are done. | ||
|
|
| ||
| 13.Cleaning . The first ribbon is loosened from the glass-table, pick it up at one end and pull straight up. The ribbons have a tendency to curl up. This is not good for the nerves so make sure that you keep it stretched until we have turned it up side down (soap up). The soap is now gently swept away with a wet sponge. The curling tendencies will disappear at this point. | |||
| This is a little bit too exiting from time too time. Be cooool. | Some tape too hold it down for cleaning. | ||
|
|
| ||
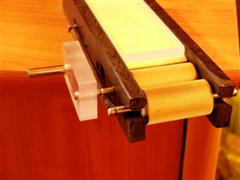
| 14. Corrugation and assembly. For this you will need a corrugating device. Place the ribbon at the center and in an exactly 90 degree angle to the device. Feed the ribbon in so that it sticks and place the guiding-board on top. Corrugate, it's fascinating. If you are unlucky it will get a little crooked, unfortunately you just have to throw it away. Earlier kapton-ribbons where thicker and they where recorrugateable. Not possible with these ones. | |||
|
The soap comes of with water. |
Rubber roller (?) again. | ||
 |
| ||
| Corrugating device. |
Ribbon in place before corrugation. | ||
| 15. Attachment of connectors to the ribbon. Flatten out the corrugation on a 5-6cm surface at one end. A straight piece of plastic will work, that will also come to use next. You hold it in a 90 degree angle on the ribbon and it will work as a support when the connector is placed on the ribbon. Then you fold the short end of the ribbon around the edge of the connector and on to the other piece of tape. Use the rotary knife to trim of the excess ribbon. Remember that the ribbons are supposed to be shorter than the magnetic gap. One inch seems to work just fine. The same ribbon length in both channels of course. | |||
|
|
| ||
| The spring is giving substantial pressure too the second wheel. | Coming along just fine. | ||
|
16.
Put something appropriate over most of the magnetic gap. (To protect the
ribbon during assembly). Take the first ribbon connector and push it into the
card edge connector. Then lift the second
connector and remove the safety sheet
with your other hand. Push the second connector into the, well you know
where. Center the ribbon at the support-points and push the loose parts
into place. It will work better if they are a little wet. Remember the mild force. Assemble the parts. Done. |
|||
|
| |||
| Corrugation smoothed out. | Connector folded down with support. The double coated tape is missing in this picture. | ||
|
Assembly procedur. |
|||
|
|
| ||
|
Ribbon. |
Double coated tape . | ||
|
|
| ||
| Magnet gaps length minus 5cm | = 102 cm . | ||
|
|
| ||
| Ribbon support using latex hose | Small bump in the ribbon but..( hmrrm ). | ||
|
|
|||
|
All wired and ready for final assembly! |
|||
© Bengt Dahlberg & HiFiForum.nu except: Logos and Trademarks are property of their owners. All Rights Reserved | |||