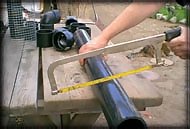
 Next, you will need to cut three lengths of the
3" ABS pipe. Two at 3 inches long and the third one about 12 inches long. The easiest
way is with a hack-saw. The 12 inch piece is only a rough estimate for the length and will
be re-cut later. Next, you will need to cut three lengths of the
3" ABS pipe. Two at 3 inches long and the third one about 12 inches long. The easiest
way is with a hack-saw. The 12 inch piece is only a rough estimate for the length and will
be re-cut later.
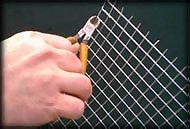 Using wire cutters, cut the
1/2" screen wire into a X inch by 12 inch piece. The "X" represents the
inside length of the cooler (19-1/2 inches with ours). When cutting the length-wise side
cut the further end of the wire so that they are left to stick out. These will be used to
attached the wire to its self when rolled (pictured below-left). Using wire cutters, cut the
1/2" screen wire into a X inch by 12 inch piece. The "X" represents the
inside length of the cooler (19-1/2 inches with ours). When cutting the length-wise side
cut the further end of the wire so that they are left to stick out. These will be used to
attached the wire to its self when rolled (pictured below-left).
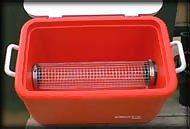
 Roll the screen wire piece
around a spare piece of 3 inch ABS pipe so that it has a basic tube shape. Lower the wire
tube into the cooler and slide the 3" id
double-female connectors (the two 3" long pieces of ABS pipe you cut) through the
holes you cut so that an equal amount sticks out either side. Twist the screen wire into
as tight a tube as you can and attach the clamps. Roll the screen wire piece
around a spare piece of 3 inch ABS pipe so that it has a basic tube shape. Lower the wire
tube into the cooler and slide the 3" id
double-female connectors (the two 3" long pieces of ABS pipe you cut) through the
holes you cut so that an equal amount sticks out either side. Twist the screen wire into
as tight a tube as you can and attach the clamps.
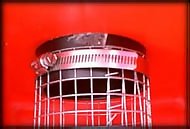
 Using needle-nose pliers, bend
those end wires you purposely left on under and over the lower screen wire to hold it in
its tube shape (pictured center). If a few of these break off its not a problem, but if a
lot break off you may need to use some light-weight bailing wire to re-enforce the seam of
the wire cage. What you should have is a tube-shaped wire cage that is attached at both
ends of the chest (pictured right). This is the chamber that the fog will pass through and
be cooled in. Using needle-nose pliers, bend
those end wires you purposely left on under and over the lower screen wire to hold it in
its tube shape (pictured center). If a few of these break off its not a problem, but if a
lot break off you may need to use some light-weight bailing wire to re-enforce the seam of
the wire cage. What you should have is a tube-shaped wire cage that is attached at both
ends of the chest (pictured right). This is the chamber that the fog will pass through and
be cooled in.
Fog Chillers
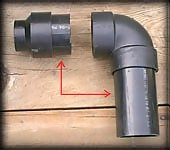
intake components from top to bottom.
3" to 2" ABS
Reducer
3" section of 3" ABS pipe (not visible)
3" ABS 90 degree elbow joint
12" long section of 3" ABS pipe
3" ABS 90 degree elbow joint
3" section of 3" ABS pipe (not visible)
3" ABS plastic double-female connector |
|
|
Do not glue
these pieces of the intake assembly together. Once they are pushed together they will stay
in place. This way if you need to swivel the section or disassemble it you'll be able to.
 |
1 2 3
Fog Machine Chiller Pages |
 |
|